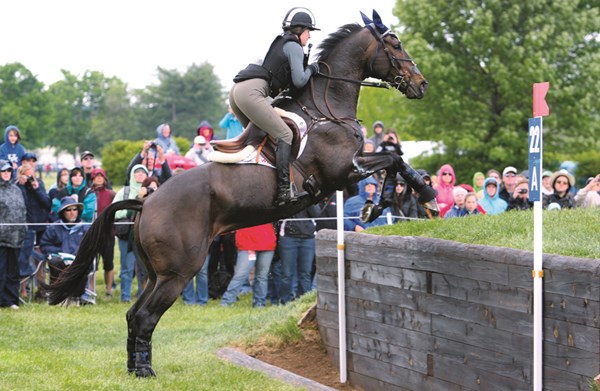
 I love this photo of Erin Sylvester and No Boundaries (Bucky) at the 2012 Rolex Kentucky Three-Day Event. It demonstrates the technique you should use to jump up large banks. Erin’s stirrup leather is vertical, her heels are down and her whole attitude is one of going with Bucky. Although her upper-body position looks a bit exaggerated, it is actually correct. If her seat were closer to the saddle at this instant, she might cause Bucky to drop his hind legs, which would have disastrous results. In the next instant, Bucky will touch the bank with his front feet and then bring his hindquarters up to meet Erin’s seat bones. Because her position is correct, the angle of Erin’s upper body will not change. Only her elbows will oscillate back and forth to maintain her connection with Bucky’s mouth. | © Allie Conrad
Should you use the same technique for cross-country as for show jumping, or are they different?
My answer to this frequently asked question is “that depends.” Certainly you should use the same fundamentals for both disciplines—including a vertical stirrup leather, a straight line from your elbow to your horse’s mouth and so on. However, there are some necessary differences in your technique and we will discuss them as well.
First let’s talk about the similarities. For both show jumping and lower-level cross-country jumping, you should adjust your stirrup leathers so that you have a 90-degree angle behind your knee when seated. Initially you should be able to use the same saddle for both jumping disciplines. (The type of saddle and length of stirrup leather you need changes when you are competing at higher-level cross-country events, but we are talking about the similarities right now.) Regardless of the particular discipline involved, once you have this 90-degree angle behind your knee, I want to see a vertical stirrup leather at all times. The stirrups are the “ground” for you, and you always want to keep the ground underneath you.
More commonalities: In addition to your vertical stirrup leather, I want to see a straight line from your elbow to your horse’s mouth at all times because this is the most efficient connection. When approaching an obstacle, I want you to keep your eyes on the top of the obstacle until it goes out of sight between his ears. By looking at the obstacle, you will know what sort of stride your horse is going to use to jump the obstacle. It does not matter so much that you are going to leave slightly long or short at the obstacle; it matters that you and your horse do the same thing at the same time. Seeing your stride is hard if you do not see the fence. Once the obstacle goes out of sight, you and your horse are now taking off and you should concentrate on allowing him to bring his withers up to you rather than you snapping forward over his neck.
As your horse jumps, you should remain in a poised two-point contact with the saddle while the angle at your elbows opens and closes in rhythm with your horse’s head and neck. Although I might refer to you as having “good hands,” I really mean that you have “good elbows.” By this I mean that your upper body is quiet while your elbows work to maintain the consistent contact with your horse’s mouth.
Speaking of contact with your horse’s mouth while jumping, I am a big fan of jumping young horses with loose reins. I want them to use their heads and necks naturally in order to improve and confirm their bascules. (Bascule is a French word that refers to the shape horses display in the air, hopefully forming a perfect half-circle with their bodies above the obstacles.) However, once you and your horse have some experience, you should begin to keep an even contact with his mouth throughout the five stages of the jumping effort—approach, takeoff, flight, landing and departure.
Because modern course design places a premium on the ability of horse and rider to communicate quickly and effectively, you obviously need a consistent contact with your horse’s mouth. Just as obvious, I hope, is that you cannot have good hands unless you have a good lower-leg position.
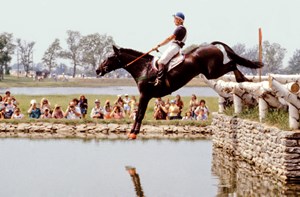
 At the 1978 World Championships in Lexington, Kentucky, the rules allowed much deeper water than what’s permitted today. Obviously, deep water produces a terrific shock of landing due to the dragging effect of the water on the horse’s front legs. Riders learn to sit very defensively in this situation. In this photo, you see Carawich (Pop) jumping bravely into the Head of the Lake. I am in a classic position for jumping a 6-foot-6 drop into deep water. | © Karl Leck
Shorten Up!
This point brings me to the differences between show jumping and cross-country. First, the foundation—your lower leg position—is the same. I consider it so important that in April 2009, I wrote an entire column about it, “Why a Vertical Stirrup Leather is Critical on Cross Country,” which you can read online at www.PracticalHorsemanMag.com.
Because of the additional speed cross-country galloping and jumping require, however, you need to adjust your stirrup leathers accordingly. Here is my rule of thumb for my students: at Novice, Training and local Preliminary levels, I want you to use the same length of stirrup leather as for show jumping—a 90-degree angle behind your knee when seated. As you progress up the competitive ladder, I want you to shorten your stirrups 1 inch for each level. For example, at the one-star level you should ride 1 inch shorter than you do for show jumping (usually one hole equals 1 inch). You should ride 2 inches shorter for two-star and so on.
There are several reasons for shorter stirrups. You will be jumping up steeper slopes and landing over bigger drops, and you need to adjust your body to compensate for your horse’s increased speed. Shorter stirrups allow you to produce a more efficient spring behind your knee, which allows you to absorb the shock of faster speeds more efficiently. Additionally, many upper-level horses take a keen interest in cross-country and you should ride a horse that pulls with shorter, not longer, stirrups. When you ride with shorter stirrups, you can use the weight of your body as well as your strength to control an enthusiastic horse.
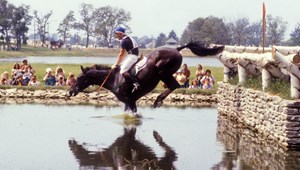
 In this photo, you can see the depth of water by looking at Pop’s knees. Although this instant looks as if Pop and I are going well, two things are about to give me a heart-stopping moment: My lower leg has slipped slightly behind the vertical and the closing of my knee angle has collapsed my seat down onto the saddle. Unfortunately for me, I have crossed the line from sitting behind the motion to sitting down. Because my seat bones are down on the saddle rather than suspended just above it, Pop is about to give me a terrific kick in the seat of the pants. | © Karl Leck
When I am helping you first get accustomed to galloping and jumping with shorter stirrups, I will usually have you canter and jump with your stirrup leathers two holes shorter than show-jumping length. At competitions, I will have you ride one hole shorter than show jumping. Because you practiced riding at home even shorter than your new competitive length, the new length will feel comfortable at the event. (This is the reverse process of practicing your dressage with no stirrups. A few moments spent riding with no stirrups gives you the sensation that your stirrup leathers are shorter when you pick up your irons again.)
Another difference between show jumping and cross-country is the variable terrain that is an essential part of the cross-country course. The change in terrain means that you must become adept at jumping up steep banks and down drops. The position that you should use to jump up or down correctly on cross-country is very different from the normal two-point position you see in the show-jumping arena. When your horse jumps up a bank, gravity exerts a powerful effect on your upper body, pulling it back into the saddle. If you surrender to this force, you get left behind—and your horse will usually drag his hind legs as he steps to the next level. You must make a strong effort to land above your horse’s withers when jumping up a bank, and shorter stirrups will help you stay with him on the way up.
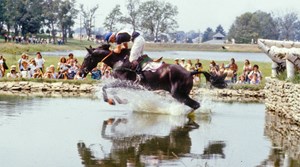
 This photo shows that at the upper levels, mistakes have consequences. Because I landed sitting down, I have been catapulted up Pop’s neck in this moment and I have to depend on luck and grip to stay on. Fortunately, Pop got out his butterfly net and put me back in the saddle, but things could have gone wrong for me. I suspect that if I had been riding one hole shorter, my seat bones would have been above the saddle and I would have landed in a much happier position. | © Karl Leck
If you are jumping down a drop, you need to stay behind the motion. Speed magnifies mistakes. The slightest bobble on landing will be enough to dislodge you, unless you are riding defensively. When you look at photos of good riders jumping on the level, up a bank or down a drop, you will notice they have their lower legs in three very different places for each type of effort. When jumping on level ground, their lower legs will be at the girth; when jumping up a bank, their lower legs will be well behind the girth and when jumping down a drop, their lower legs will be in front of the girth. If you look at those photos again, you will notice that when jumping correctly for each situation, the riders may have very different lower-leg positions, but their stirrup leather in each instance remains vertical because that alignment offers the best support to absorb the shock of landing.
Bigger Drops Mean Shorter Stirrups
And speaking of the shock of landing, jumping larger drops (4 feet or more) is yet another reason for riding shorter than you might expect. When your horse lands over a big drop, his back forms a 60-degree angle with the ground. If you are riding with your stirrups at show-jumping length, your seat will be “on” rather than “close to” the saddle. As your horse clears the obstacle with his hindquarters and prepares to land, his back will give you a terrific kick in the seat of the pants, with unfortunate results for your balance. Find a series of photos that show a rider jumping well over a drop fence, but becoming unseated from the thrust of her horse’s back as he lands. She hopefully will come to no permanent harm from the involuntary dismount that results. On the other hand, remember that if you jump in over a big drop with your upper body far too forward, chances are you will pop off over your horse’s shoulder.
Bigger drops are one of those cross-country moments when small adjustments make a big difference. We often see riders who appear to be correct at the peak of the bascule: They are behind the motion without being left behind, they are slipping their reins correctly and they should land with their stirrups beneath them. Yet in the next split-second, they suddenly seems to be catapulted over their horses’ shoulders. Sometimes they miraculously recover their position, but most of the time they fall off over the shoulder, trip their air bag and lead their horses home with a grumpy expression on their faces.
When you study slow-motion video of this moment, however, you can see why and where things went wrong. You usually will notice that the rider started over the drop in good shape, but as the horse lifts his hindquarters over the obstacle, you realize the rider has crossed the line from sitting behind the motion to sitting down and back on the saddle. As you slowly advance the slow-motion video, you discern an instant where the rider is suddenly dislodged.
Stop the video there. Imagine that you can take the rider’s silhouette and Photoshop her knee an inch higher above the horse’s back. Don’t change any of her angles, just move them higher in the saddle. You will see that if her position had been an extra inch or so higher, her horse’s back would have passed through under her seat rather than kicking her in the seat of the pants. You do not have to create an enormous space between your seat and the saddle in order to allow your horse to use his back naturally. Your horse does not care if your seat is 1 inch above his back or 1 foot.
Reins: Enough Contact for Balance
Regardless of the description, the intention is to help your horse leave the ground in a balanced condition. Your bit serves the same purpose for your horse that a bamboo pole does for a high-wire artist at the circus. It is not attached to anything fixed, but it can be used to alter the center of gravity for an instant.
When you experiment with this technique, remember that pulling back on the bamboo pole does not help the guy on the high wire. Pulling back on the bit will interfere with your horse’s jumping effort, while a steady connection at the point of take off will often make the difference between success and failure.
Because of the changes in terrain, cross-country riders do not have the luxury of keeping the same position all the time. They must have three good positions, depending on if they are jumping on the level, up a bank or down a drop. There is no perfect position, but there is a good position for that situation at that instant.
This article originally appeared in the October 2014 issue of Practical Horseman.


